How do I approach a Colour Grade?


This is a question I sometimes I get asked by students or film makers just starting out. The industry is ever evolving, so things that you were taught may have changed by the time you complete your course.

As an experienced colourist, I am always happy to help de-mystify the process and the lingo.

This is a brief overview of the process leading up to and following the grade. All of which have an impact on the grade session, so I felt it was important to lay out all the steps in the simplest way possible.

You might be the director, producer or cinematographer who needs to know how to make the most out of your grade experience. As with most endeavours, being prepared is key.

Where is my film going to be viewed? What are the delivery requirements?

Understand first, what is required as your final deliverable. This will dictate how you shoot and the resolution of your original captured media. It may determine your camera speed 24fps vs 25fps. Knowing whether you need to deliver an HDR version as well as an SDR version, or a theatrical version as well a broadcast version, can change how you allocate your budget and book your facilities.

Pre-Production

Prior to the shoot, cameras and lenses will have been selected. Actors will be cast, and locations decided on. You and your team will have discussed and decided on the look of the film, possibly even carefully art-directed the props, set, wardrobe and lighting. There may be ‘mood boards’ created, or reference images/footage discussed.

Mood boards from ‘Red Dog – True Blue’

Director Kriv Stenders:


For more information on setting the look for your project here are a couple of helpful links:

https://www.studiobinder.com/blog/how-to-use-color-in-film-50-examples-of-movie-color-palettes/

https://nofilmschool.com/Film-color-theory-and-color-schemes

A great book that can help with colour palettes and their meaning is

If It’s Purple, Someone’s Gonna Die: The Power of Color in Visual Storytelling- Patti-Bellantoni

Step 1 : Camera department would need to shoot tests:

– Camera and lens tests – this is now an insurance requirement for most projects. These tests will ensure the equipment is working as it should and if it suits the requirements for you.

(Camera hire facilities will help you get tests shot with charts etc – here is a link to a local equipment hire place in Melbourne; https://www.lemac.com.au/Products/SetToolsConsumables/ChartsSlates.aspx

– Makeup/hair tests and wardrobe tests – to ensure that the colours are looking as anticipated, that the makeup looks correct under the lighting on set etc

– LUT creation tests – if you would like to craft a bespoke look for your project, a colourist can generate a LUT (look up table), which is a single ‘colour grade’ that will be used while generating proxy media for your editorial department and production department. This sets the look right from shoot and illustrates to those viewing the rushes, where the final grade might be heading. Before shooting tests for LUT creation, speak with your colourist about what needs to be shot prior to the tests.

If you are happy to use the camera manufacturers generic LUT’s, they bring your Log C (camera original raw) signal into the correct colour space (contrast, saturation etc) for editorial purposes.

Production

Step 2 – The Shoot:

It is imperative to check all footage that is shot (for dropouts, corruption, focus etc).

Back up camera-original media to two separate drives. This too is an insurance pre-requisite.

Copy camera original* to a lower-resolution proxy file and apply LUT (when creating the proxy) or supply the LUT to editorial for the editor to apply when cutting the footage.

A DIT ‘digital ingest technician’ usually does this on set or back in post-house during the shoot. Reports about the footage may be sent to the production team if there are any issues worth noting.

*Keep camera original footage ungraded and in its original state. The timecode and meta data that is copied across to your proxy media will link back to this original unaltered media.

Production & Post-Production simultaneously

Step 3 – Offline editorial

The director works with the editor to cut the footage and create your final timeline. This may take days/weeks and it is the place that decisions are made, unmade and re-tweaked until everyone is happy.

Post-Production

Step 4 – The ‘Offline’ edit is now locked and sent to all departments for preparation

A copy can be sent to the audio department so that they can commence their mix and additional music etc.

Shots that require VFX will be ‘pulled’ and sent to the VFX house for them to commence their work. These would be high resolution copies of the original media.

A copy of the offline also gets sent to the post house along with the original camera media and EDL. The post house creates a timeline using the offline timecode information to bring in the camera-original files (which are much larger files). A timeline is created and checked before handing it over to the colourist.

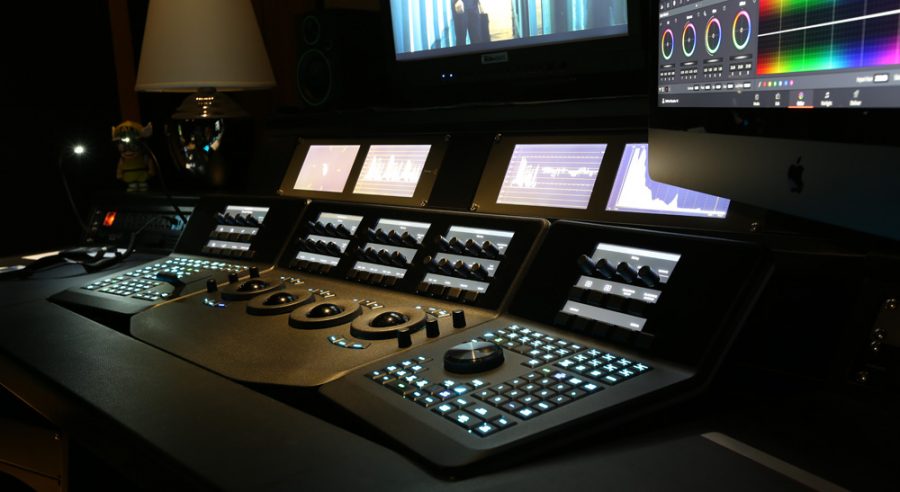
Step 5 – Colour grade. Mood boards, reference footage and images may have already been sent to the colourist prior to the session. Sometimes the offline is sent to the colourist prior to the grade too, so that the colourist has a good idea about the story and the sections of the timeline that might need more time spent to balance shots etc. If this is not possible, the colourist is briefed by the director and/or the cinematographer regarding the look for the project at the commencement of the grade.

How I approach a grade is to go through the timeline and balance the exposures, look out for things that shouldn’t be in shot (boom, crew, 2nd cameras etc) and get a good sense of what might need extra attention. This process can be done in advance of the director and cinematographer arriving as it is more of a technical process.

Then, once the timeline is evened out, shots reframed to hide things that shouldn’t be in shot, we; (the director, cinematographer and colourist) commence the ‘look’ pass. With a well-balanced timeline, it is more straightforward to apply a colour cast or mood across the film.

This is where we can experiment a little with the look, taking careful note of the original concept as planned at the pre-production stage, then embellish, enhance and make the most out of the images.

Having clarity about the look prior to coming in to do the grade, will save a lot of time and possibly a chunk of your budget. While the terminology may be baffling at times, it can be as simple as bringing in some sample images and pictures to show the colourist. No tricky terms are required when we can glance at an image and see immediately what you are trying to achieve.

Step 6 – Mastering and Deliverables

An online editor will now bring together all the parts; graded master, audio master, titles and credits and do any other little last minute *fixups required before creating the final master. From this master your deliverables can be made (broadcast/web/feature film).

Step 7 – Quality Control Checks

All projects that are delivered to streaming platforms, broadcast companies and theatres will go through a technical QC. There are strict criteria and standards that must be met according to which supplier you are delivering to. A range of 1 – 3 is usually  marked against any items that are deemed ‘faults’ and it is up to the production team to correct and resupply masters and pay for a follow up QC before deliveries can be made.


panels

Setting Up a Grading Environment

All grading suites need to have a correctly calibrated monitor for the colourist; what does that mean?. There are technical standards (see SMPTE RP 166-1995- for guidelines) and these following measurements for light out-put come from a wonderful broadcast engineer that I worked with for many years.

COLOUR_BARS100% white is measured at 35 foot-lamberts, IRE100 or 700mV video range. Some digital display manufacturer recommendations may specify ideal peak luminance varies between 20-30ftl (69-103cd/m2) The light out-put of the white patch at the bottom of ‘bars’ is measured with a probe to check the monitor.

An automated LUT generator and a monitor that has a LUT input capacity is usually required to balance a monitor. A technician with a probe will run a number of tests through the monitor to calculate any discrepancies and adjust the monitor accordingly.


Viewing distance should be 3 x the height of the monitor for the colourist. So selecting the size of the monitor may depend on the size of the room and depth of the desk.

There are many different broadcast quality monitors on the market. Choose the highest resolution affordable and ideally, ensure it is future-proof by selecting one that can monitor 4K Ultra High Definition and High Dynamic Range.

  • OLED Monitoring (expensive and small), self illuminating,

http://pro.sony.com/bbsc/ssr/cat-monitors/cat-oledmonitors

  • Dolby LCD Monitoring – peak luma measured in cd/m2 (candela per metre squared). Equivalent of 35ftL is 119.92 cd/m2 (also referred to as ‘nits’)

http://www.dolby.com/us/en/professional/hardware/video-monitors/prm-4220-professional-reference-monitor-details.html


Suite Lighting:

  • The room needs to be painted in a neutral 18% grey to ensure there is no colour bias introduced in the environment that can reflect on the screen or impact on making colour decisions.
  • If there are windows, they need to have complete black-out capability to stop external light filtering into the room.
  • Monitors need to be placed in a position to ensure no reflections from an opening doorway can hit the screen.
  • Neutral lighting with a colour temperature of 6500k will balance with the light output (D65) of the screen.


Ideally light controls should be within reach of the colourist so that they can adjust levels according to requirements (brightening up when someone comes into a dark room with a hot coffee for instance!)


Recommended Light levels in different areas of the room:Color-Grading-Suite

A backlight ‘bias light’ is ideal to reduce eyestrain. Surround lighting 3.5ft Lamberts

Client area 2-10ftL

Colourist area 3-4ftL


Ergonomics

Desk height and depth need to be carefully considered to suit a variety of requirements:

-Neutral or dark coloured bench top that won’t scratch as equipment is moved around on it and have a surface that can be easily wiped clean

-Height and reach of colourists (we come in all shapes and sizes)

-Adjustable, ergonomic, comfortable seats that can fit under the desk

-Knee/leg room under the desk

– Height of desk, with panels on top, need to be low enough to allow a 90 degree angle of arms and thus ensure correct ergonomic posture for colourist

– Size (height, width and depth) of colour grading panels –leaving room for the panels to be swapped around for left hand/right hand operators

grade_suite

– Room for all peripheral equipment; keyboards, pen and tablet, note pad, etc

-Elbow room for client to sit alongside (potentially with laptop or notebooks)

– Standing desks are now very popular in edit suites and could be possible in grade suites too – (may need to think about how the monitoring would be changed along with the height of the desk if it is wall mounted)

Comfort

– Viewing distance for clients monitor needs to be considered

– Sufficient space in the room for required number of clients

– Comfortable seating, (with cushions for those who are shorter)

– Coffee table(s) within reach of all clients for cups, laptops, notes

– Decent wi-fi connectivity

– Adjustable air conditioning/heating controls

– Coffee/ Tea facilities within walking distance

– Bathroom facilities within hop-skip and jump distance (!)

– Coat hook(s) on the back of the door perhaps*

– Drawers or small cupboard to stow incidentals (bags, pens, cables)*


*As the environment is usually very dark, tripping hazards such as bags, backpacks, satchels need to be placed out of the way.


Vincent Dee

Pod Cast with Vincent Taylor

A delightful chat with fellow colourist Vincent Taylor, (currently residing in New York and working at MPC) has been made into a podcast for your listening pleasure. We talked about how we got started in the industry, how curiosity can be a great way to get started and how adaptability is now the essence for continuing in the industry, especially with changing technology, expectations and of course the pandemic.
Here is where you can check it out:
NFU-Studio-Tour-key

Where it all started in TV & Film Industry


NFUJust chatting recently with a fellow colourist about where I started my career and what inspired me to get into the film and television industry. Then low and behold, I came across this incredible promotional film that was created the very year I started with the New Zealand National Film Unit in Avalon, Wellington. So many departments to choose from as I learnt to process print film first then moved ‘up’ to the negative film processor. Finally the colour grading department allowed me to come and play and learn. How magnificent to take images and make them really shine. It has been my passion ever since. Huge credit will always go to Johannes Kornigstorfer and the kindest teacher Lesley Fisher-Robson who does actually feature in this short film:

Studio Tour | Short Film | NZ on Screen:

https://www.nzonscreen.com/embed/ec59a8e447200c18

So, what can't you do as a colourist?

So, what can’t you do as a colourist?

blog

That might sound like a backhanded complement, but while a great many amazing things can be achieved in the grade suite, in the edit room or by a VFX team, there are limitations.

A brave, thoughtful cinematographer asked just recently, “Are there things we do that you’d prefer we didn’t do and are there things that happen in camera that just cannot be ‘fixed in post’?”

Here is the short list that I can share from my dark grading suite;

Focus – if it is soft, it will remain soft. There are some tricks to enhance edges and give a false sense of sharpness to some images, but out of focus is definitely OUT.

Underexposure – if the image hasn’t got sufficient exposure to register on the camera sensor all you get is noise as the sensor cannot create something out of nothing. Nor can a colourist.

Overexposure – that beautiful highlight detail and subtle range of bright exposure that you saw on the day may have been clipped out completely by the camera sensor if the exposure setting was incorrect. Sadly there is just no getting that back. Like under exposure, the highlight detail hasn’t made it to the sensor and all you get is a flat white where there should be detail.

Exposure adjustments mid shot sometimes cannot be avoided, but these shots (or part of the shot) might be left on the cutting room floor during the edit. If the shots do make it into the final timeline, a bit of extra time might be needed to disguise the in-camera adjustments once you get into the grade suite.

Rolling shutter distortion – warped images often caused by a rolling shutter or certain shots captured via a camera on a loose mount (for instance attached to a car or helmet cam) cannot be corrected enough to look stable. Certainly the tools at my disposal in the grade suite are not yet that advanced. But who knows, maybe out there somewhere there are clever people with software, hardware and skills to fix this issue? Happy to stand corrected and be informed, so please feel free to educate us with your wisdom!


Playing-For-Keeps-Season-2

Silver ACS for Drama Series ‘Playing for Keeps’ Series 2

Very pleased for Director of Cinematography Marty Smith for the Silver Award in the 2020 Australian Cinematographers Society Awards.

This was awarded for the drama series ‘Playing for Keeps’. Congratulations!

It was an absolute pleasure to work with Marty as his colourist.

Here is a link to his post on Facebook:

https://www.facebook.com/marty.smith1/posts/10157414634926583

It is really lovely when a Cinematographer acknowledges their colourist:

Dee McClelland- thank YOU! As DP’s we’re nothing without colourists – you took care of, and then elevated my images


Mandalorian-Virtual-Sets

Virtual Sets happening in Melbourne soon

26 July – Clayton Jacobson of Dreamscreen Australia received seed funding to begin building Melbourne’s largest Virtual Production Studio. Testing at The Dockland Studios was scheduled to happen over the following weeks.

https://dreamscreenaustralia.com

For more information about this new technology here are some links

Mandelorian

https://www.youtube.com/watch?v=tpUI8uOsKTM

Run TV Series

https://beforesandafters.com/2020/04/13/run-and-real-time/


chef antonio

“Chef Antonio’s Recipe for Revolution” Australian-Italian Co-Production


It was a delight to work on this project with Producer Lisa Wang and Director/Writer Trevor Graham. The cinematographer, Jenni Meaney and I managed to squeeze in a couple of days together in the grade suite at Soundfirm between Covid lockdowns here in Melbourne. Observing all the protocols of distancing and sanitisation, she joined me to review the grade and sign off on behalf of Trevor who was unable to join us from Sydney.  Some of the biggest challenges, as is often the case these days, is matching different cameras to keep the grade as seamless as possible.  Fluorescent lighting in the kitchens and incandescent lighting in the dining rooms also made for some crafty colour work. It was gratifying to get this comment from Trevor when he eventually got to see the finished resul

The grade is fabulous. Well done Dee you have done a beautiful job.

We saw the grade on the big screen in the mix theatre yesterday. The picture grade looked superb. You did a brilliant job and Lisa and I are very very happy with look of the film. I’m sure Jenni will be too when she eventually gets to see it projected.
Dr Trevor Graham
Yarra Bank Films Pty Ltd
Dee, I went to SF to sign off on the DCP last week and have been meaning to say how BEAUTIFUL the pictures are! Those shots of Asti made me almost want to cry, so rich and inviting. Thanks again for your incredible eye and instincts. 
Lisa Wang
Black Sheep Films
http://www.blacksheepfilms.com.au


An article written in ‘If’ Magazine about the lovely chef antonioTrevor Graham who directed, produced and shot this great documentary.

It was a delight to be their colourist and a wonderful insight into the kindness of Chef Antonio who is making a big difference in the lives of these young aspiring Chefs….

Chef Antonio’s Recipes for Revolution is the first feature documentary to be granted the status of an Australian-Italian official co-production. Since a special treaty with Rome was signed in 1993, there has been only one previous Australian co-production with Italy – the 2015 drama, The Space Between. But our project didn’t start out that way. All film financing is like a roll of the dice. You never know what numbers will come up.

For more:

#chefantoniosrecipeforrevolution
#trevorgraham
#lisawang
#jennimeaney
#soundfirm
#colourist


the-masked-singer-full-jduges

“The Masked Singer” Season 2 – Behind the scenes at City Post

There was a whole new set of challenges on this project; being flexible and adaptable not the least of them. Schedules and timelines changed constantly to fit in with the changes happening on set. The team at City Post were the ultimate jugglers, getting everyone working together and apart, to get the job done.

The grade schedule was really tight with last minute changes to edits there was a lot of running back and forth between the conform department and the grade suite. But we did it! Phew.

Terrific team work all around. For more information here is a recent post on the City Post website:

https://www.citypost.com.au

Post production facility City Post in Australia is more than used to dealing with dramas, having been the post house for shows like “The Dr Blake Mysteries’, “My Life is Murder” or BAFTA-winning and Emmy-nominated “The Cry”, but when the second wave of coronavirus swept across Melbourne in June, they weren’t expecting the real-life drama that was about to unfold.

TMSCity Post’s offices in Melbourne’s CBD already had their COVID-save protocols in place after the first lockdown struck while they were working on the popular ‘’Dancing with the Stars”, and they had to adapt quickly to extend their remote-editing and delivery capacity, and carry on.

Soon they had 25 post-production personnel working on-site, with five editors and one post producer working remotely to manage the fast turnaround, next water-cooler hit; being Season 2 of “The Masked Singer” (Australia). They were only a few weeks into production when the second wave of coronavirus began to take hold, and NSW abruptly closed their boarders to Victoria.

“All of a sudden we had three post producers and two offline editors with only a 48-hour window to pack everything up and get back home, while they continued to work on the show” says Wayne Hyett, Emmy-Award winning editor and Managing Director of City Post.

The first episodes of the second series were just airing and audiences were abuzz with speculation and predictions – was that the unmistakable voice of Kate Miller-Heidke, behind the Queen? But in the background, City Post was working closely with Warner Brothers and Network 10 to fast-track a whole new way of working. So as the Sydney folk were heading home, the Melbourne folk were self-isolating until their COVID test results came in, and the show continued going to air two nights a week.

“Suddenly we had to accommodate another five editors and post-producers to work from home, sometimes literally from their own computers. We were extending servers, expanding editing and production workflow capacity and communication channels with very short notice. Thank goodness we were running a gigabit connection out of City Post.” Explains Nadia Diggins, City Post’s Operations Manager.

“Normally on a reality TV show, you might have a six-week turnaround, on this show though we sometimes had six days. That’s to offline, edit, grade, integrate FX and graphics, mix and master.” Nadia adds. “They’re not simple shows to put together.”

“I’ve been in the business for 30 years and this was certainly the most challenging thing I’ve ever been involved in.” Says Wayne.

So, with all the pivoting and flipping having been pivoted and flipped, the show’s pipeline was once again ticking along efficiently, although more remotely than anyone had ever experienced before. It was now hours away from the filming of the episode finale – when several crew members tested positive for COVID-19. The show was immediately put on hold and everyone, including all the judges: Dannii Minogue, Urzila Carlson, Jackie O, Dave Hughes, and host Osher Günsberg had to head into two weeks of quarantine, and City Post had to lay their tools down again while everyone re-tested.

the-masked-singer-full-jduges“The Masked Singer” finale was rescheduled to record with many feeds streaming in from different locations, and with only five days to turn it around – it went to air on Monday 14 September. Done. Remotely. Ratings peaked at 1.191m and Twitter was a buzz with congratulations, as people came to realise that Osher wasn’t actually standing on the stage with the contestants, and that the four judges weren’t actually seated together but rather were beaming in from different states and even a different country.

The masks may be laid to rest for the end of the season, but production continues on other shows at City Post, such as weekly episodes of the kids animated series “Monster Beach”, (which just won Best Animated Kids TV Programme at the ConnectAsia Awards 2020) and new production ramps up on a big scale, yet-to-be-announced TV series drama as well as three feature-length documentaries –  and with producers, directors, editors or post-producers working off-site. No problem.

“The biggest thing we learned through this process, is that remote workflows on such a large scale, with such tight deadlines worked so well. We were able to continue without missing a beat and there’s a great confidence that comes from that”. Wayne concludes.


#citypost

#themaskedsinger

#warnerbrostv

Katie Milwright

Katie Milwright receives a Golden Tripod for “Guilty” at the ACS National Awards 2019

blog“I was so delighted to receive a Golden Tripod at the ACS National awards last night for feature documentary film “Guilty”.  Well done to the ACS for the “Online” awards ceremony last night and congratulations to all the nominees and winners.  Thanks to Director Matt Sleeth, 1st AC Grant Sweetnam, Gaffer Jared Fish, Key Grip Tim Delaney and Colourist Dee McClelland 2nd Unit DP Sherwin Akbazadeh and all the cast and crew who made this film happen.  It’s a film and story I was so proud to be part of.  Thanks!!!” Katie Milwright ACS

To watch the official trailer:https://www.youtube.com/watch?v=-fG9LsQRCv4